Showing posts with label distress ink. Show all posts
Wednesday, September 30, 2015
Metallic Look Paper
Hello crafty friends. I made this card months ago but am just now getting around to posting it. Better late than never, huh?
My sister had double knee replacement surgery. While nothing can actually make that feel better, I thought a card might cheer her up a little.
I had just watched this video that Jennifer McGuire made in August:
Faux Textured Metal Paper with Perfect Pearls
The video shows how to create a cool metallic paper look by use Distress Inks, embossing with embossing folders, then adding Perfect Pearls. The effect is quite nice in person.
I used Seedless Preserves, Milled Lavender, and Salty Ocean Distress Inks and an Anna Griffin embossing folder along with Perfect Pearls (in Perfect Pearl color).
I added some of my Multi layered flowers inked with Seedless Preserves.
I added some seed beads that I had in my stash to the center and finished the card off with some bling.
Labels:
distress ink,
metallic,
multi layered flower,
perfect pearls
Thursday, August 2, 2012
Distress Ink Reference Cards
Well, I have been so busy that I did not even get pictures of my last 2 projects before they had to be mailed. Don't you just hate that. Oh well, I still have lots more projects planned so it is ok.
Now what I am sharing today is a work in progress. I have worked on it off and on for the past couple of weeks. It will probably take another week or so before I am finished.
I am making reference cards for all the Tim Holtz Distress Products that I have.
Yes, it is a lot of work, but I found myself having to sample 3 or 4 products on white cardstock for almost every project I make. This should actually save time in the end. (at least that is what I am telling myself) LOL
If I do not have a product in a certain color I just blend ink on that area then make a note of the colors and items I still need to purchase. (I had lost track anyway)
For example, the Evergreen Bough is a Winter seasonal ink so I do not have the marker or stain to go with it.
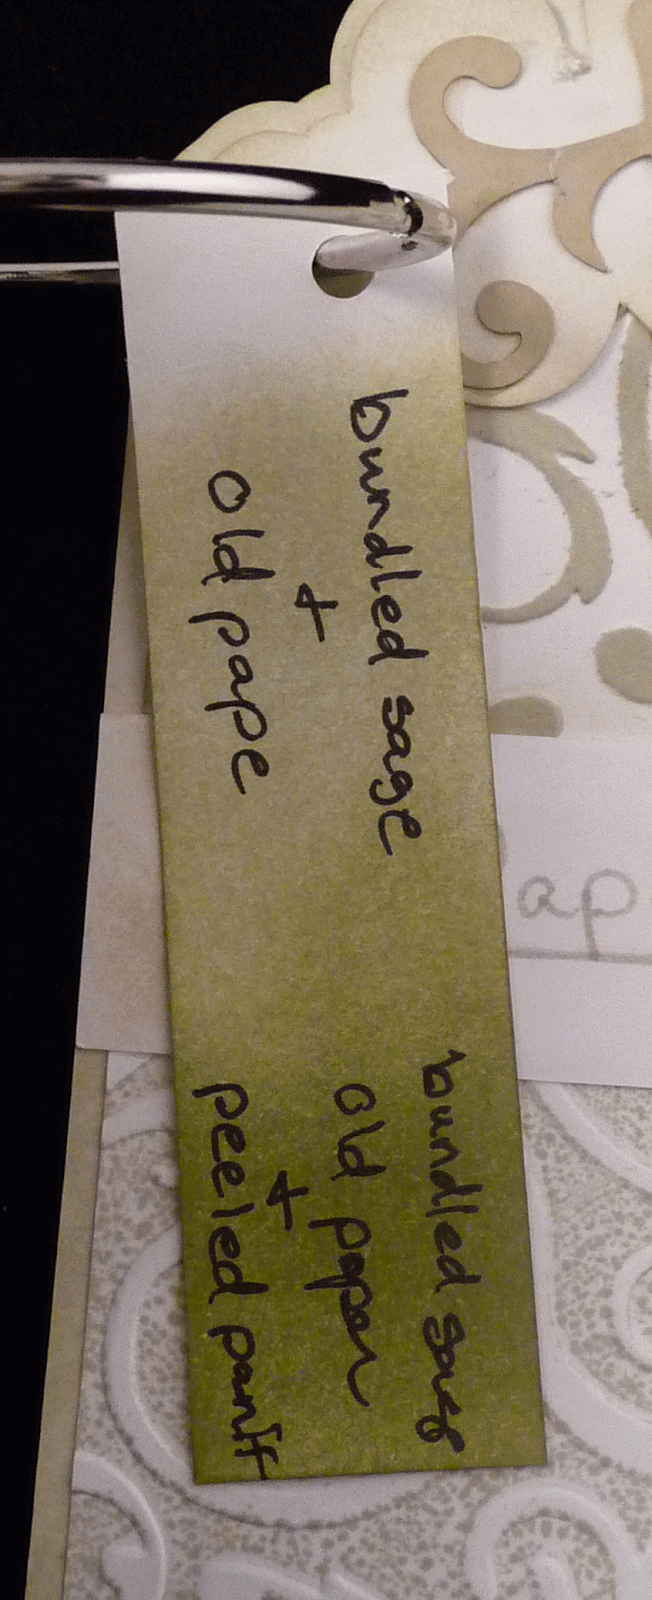
While I am at it...If there is a certain combination of ink colors that I like to use to match certain lines of patterned paper, I make a little note of that on a thin strip of paper and put it on the ring with the rest of the cards.
Now what I am sharing today is a work in progress. I have worked on it off and on for the past couple of weeks. It will probably take another week or so before I am finished.
I am making reference cards for all the Tim Holtz Distress Products that I have.
If I do not have a product in a certain color I just blend ink on that area then make a note of the colors and items I still need to purchase. (I had lost track anyway)
For example, the Evergreen Bough is a Winter seasonal ink so I do not have the marker or stain to go with it.
While I am at it...If there is a certain combination of ink colors that I like to use to match certain lines of patterned paper, I make a little note of that on a thin strip of paper and put it on the ring with the rest of the cards.
Now the next time I am working on something, I can pull out my cards and decide exactly what color Distress inks, stains, or markers that I want.
And too, there is just something kinda cool about looking at this ring full of beautifully colored cards. :)
Tuesday, April 3, 2012
Creative Chemistry 101
Well my friends, I have been super busy lately. I have not posted much so I thought I would give everyone an update.
I have been making invitations so that had kept me busy. I also participated in an online class by Tim Holtz called Creative Chemistry 101. It has been so much fun. Since it is very painful for me to physically go anywhere, it was great to be able to get over 5 hours of video instruction for Tim Holtz right here in my house. The interactive class is over but you can still get access to the class instruction at Online Card Classes. For $35 you get lifetime access to the videos.
I am not a very good stamper, so I had to adjust some of the techniques I learned to fit my own style. Here are a few pictures.
This one was made by stamping with Versa Mark on white card stock and brushing Perfect Pearls over the inked area. (This technique can be found on You Tube and was not on the technique video so I felt safe if sharing it.) I added the stamped butterfly that I cut out and a handmade rose I made if some Perfect Pearls mist that Tim described in one of the videos.
Like the shaped layers? I cut them with cut files I made. You can download them here: Bracket Labels PC
Each day of the course we did about three techniques on tags. Here are a few of my tags.
And here is a card I made using the Reflections Stamping technique. (So fun!)
I have been making invitations so that had kept me busy. I also participated in an online class by Tim Holtz called Creative Chemistry 101. It has been so much fun. Since it is very painful for me to physically go anywhere, it was great to be able to get over 5 hours of video instruction for Tim Holtz right here in my house. The interactive class is over but you can still get access to the class instruction at Online Card Classes. For $35 you get lifetime access to the videos.
I am not a very good stamper, so I had to adjust some of the techniques I learned to fit my own style. Here are a few pictures.
This one was made by stamping with Versa Mark on white card stock and brushing Perfect Pearls over the inked area. (This technique can be found on You Tube and was not on the technique video so I felt safe if sharing it.) I added the stamped butterfly that I cut out and a handmade rose I made if some Perfect Pearls mist that Tim described in one of the videos.
Like the shaped layers? I cut them with cut files I made. You can download them here: Bracket Labels PC
Each day of the course we did about three techniques on tags. Here are a few of my tags.
Reflections Stamping
Stained Kraft Resist
(I did not have Kraft Resist so I substituted Color Me paper)
Alcohol Ink Agates
(This is so cool in person)
Stamping with Stains
Brushless Watercolor
And here is a card I made using the Reflections Stamping technique. (So fun!)
Subscribe to:
Posts (Atom)